Feeds:
Posts
Comments

*update: I failed to document the paint colors we used when painting this house, so I’m sorry for not including that information below. This was so many years ago that I’m not able to track them down at this point. My apologies!

Hello, blog friends. I won’t even waste my time apologizing for my absence because really, I have no excuse. I just decided to not blog for a while. But now that we completed a HUGE, much awaited project, I can’t wait to share!

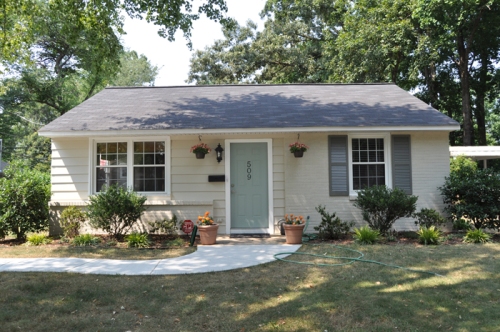
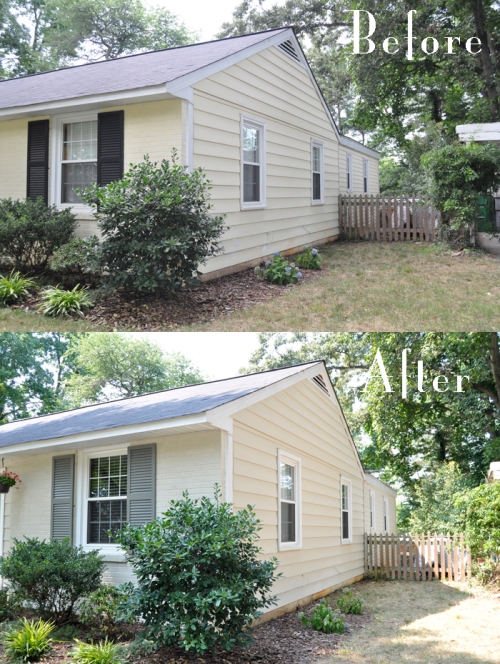
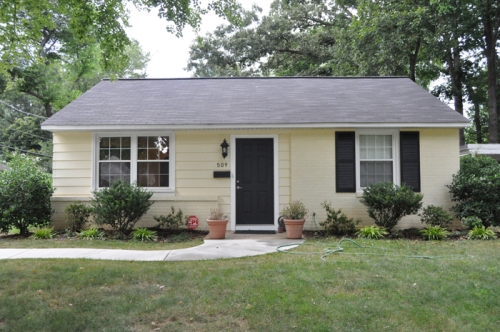
Here is our house. When we purchased it five years ago, the listing called it a “cream puff of a house” and that slogan always stuck in my mind. The color was definitely cream-puff in nature and just plain boring. The paint was in good shape when we bought the house though, so I kept my mouth shut (for the most part) and dealt with a less than lovely house color.

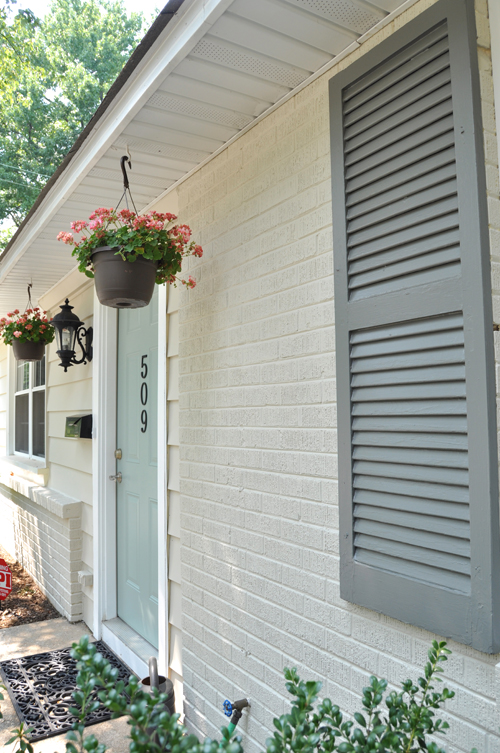
Fast forward 5 years and Scott and I were going for a walk around the neighborhood with Chachie (what my nephew so affectionately calls Charlie) when my husband said that we needed a new house project this summer. I refrained from mentioning the house color yet again, even though the paint was starting to show some wear in some areas. Well, lo and behold, without any pressing from this girl, my husband suggested that we paint the house. Two high kicks and a month later, we had our colors selected (from a starting pile of 100 options and several Pinterest ideas) and started on the project of the year. This is what we came up with:

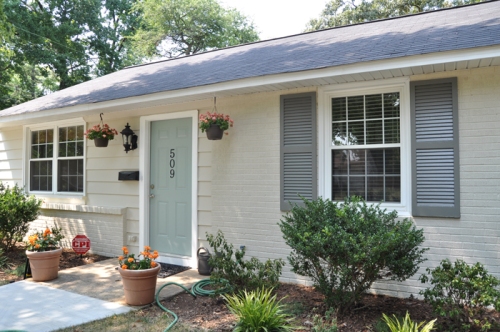
Freaking adorable, isn’t it? I’m smitten. We didn’t want a drastic change, but we did want to get away from the creamy yellow and black combination. We first considered gray, but neighbors on both sides were gray, so that was out. Then white came to mind, but we were afraid the house would look too washed out with the white trim. We then decided on a cool beige with lovely blue and gray accents, and it was the perfect decision for us. Nothing outlandish, a little bit classic and a little bit cottage. Perfecto.

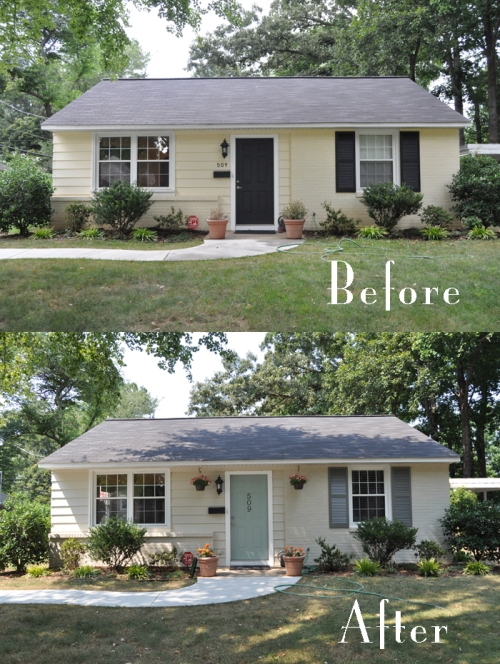
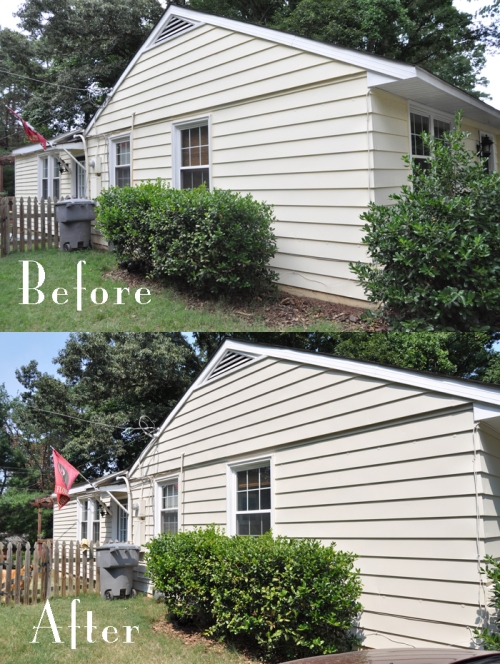
The best part (or the worst, however you look at it) is that we painted the whole thing ourselves. That’s right – we painted every square inch of our home in the beginning of an extremely hot summer. It may not have been our brightest idea, but we’ve lived to tell the tale. We contemplated renting a sprayer to make the painting part easier, but decided that the cost/time of prepping to spray just wasn’t worth it to us. My sore muscles say otherwise, but I think we definitely made the right choice. We spent about 18 hours total trimming everything, rolling, and painted the shutters and all doors new colors. We aren’t quite finished, if you look at the pictures closely. We still need to roll the two longer sides one more time and paint the foundation, but for the most part we’re there. Now, for some before and after comparisons:

Isn’t it so f***ing charming you could just die? The side by side of just the house color isn’t that drastic in pictures but believe me, it’s a big change in person. Our neighbors can’t stop commenting on how much better it looks and we can’t stop beaming (proud, much?).

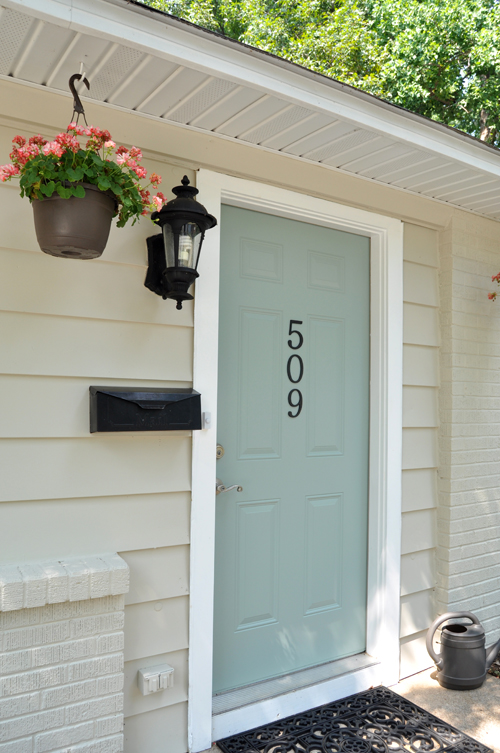
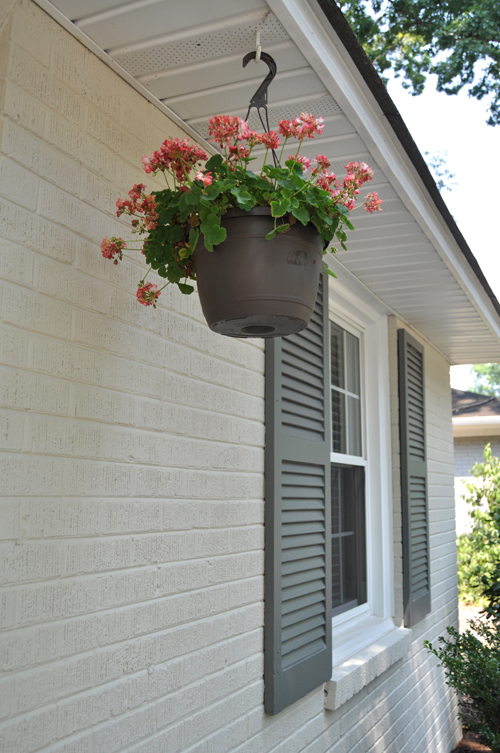
Please excuse our wilted plants – it’s 104 degrees outside. Literally. Oh, you’d like to see some more picture so the beautiful door color? I thought you’d never ask.

Hope everyone has a wonderful Independence Day holiday and stays cool!
Shed Shape-Up

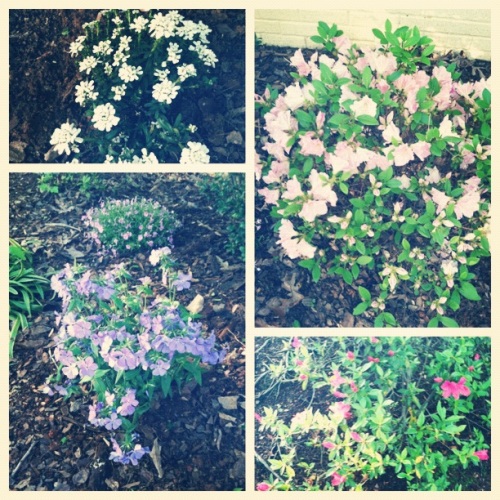
This is one of those projects that just “happened”. Scott and I have a habit of working on something and then it suddenly leads into 3 other projects that really need to be done – thus taking up an entire day, when we set out to only spend 20 minutes in the yard. Since the weather has been so nice, we’ve been trying to focus on getting our yard into better shape. Thanks to sunshine and MiracleGro, we’re actually seeing some growth in some plants that have been so-so for the past 5 years.

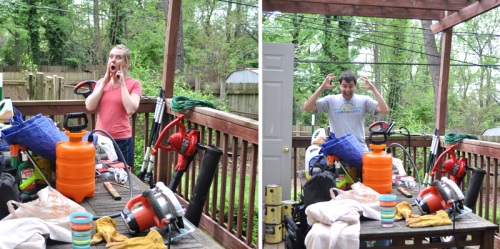
Ahh, Spring. We had a landing at the bottom of our deck’s stairs that needed some addressing, so we purchased some 2x8s to re-build it and fill in with some new, larger gravel. This entailed getting the circular saw out of shed, which then led to this:

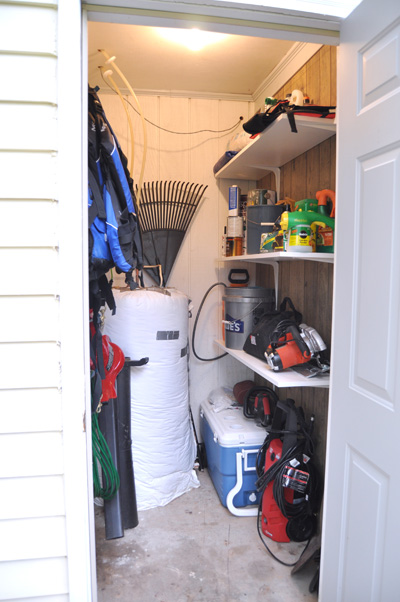
These are the contents of our tiny shed and the shocked/frustrated faces at how much crap was crammed into an unorganized space. This shed has always been a bone of contention in our household – no matter how well we organized it, stuff just ended up on the ground and it required taking everything out of the shed just to find one item. In terms of organization, this situation was not good. After completing our stoop project, we knew that we had to address this pile-o-crap once and for all, rather than just throwing everything on the floor again.

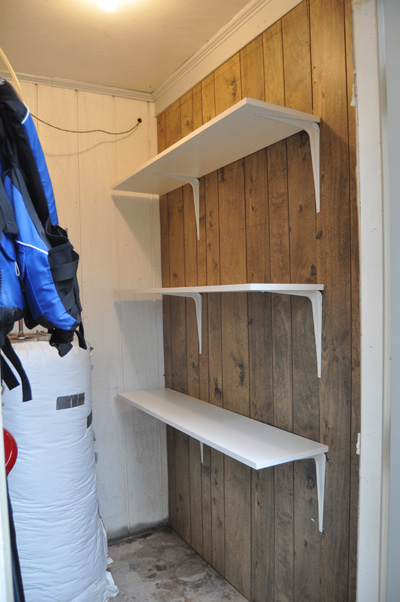
So, off to Home Depot we went, for the second time in one day. We talked to a very helpful salesperson who led us to some powder coated brackets and (3) 12×48 melamine shelves  – no cutting required.

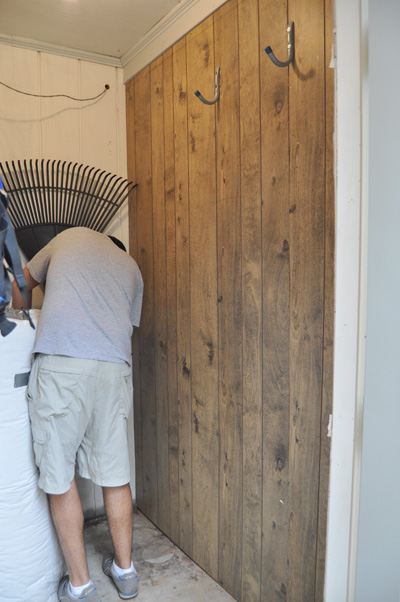
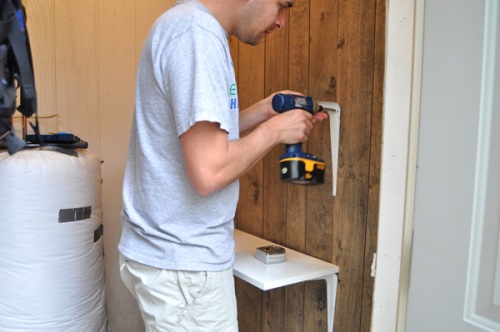
We cleaned her out, gave her a good sweeping and got to work with drilling our brackets into some studs.

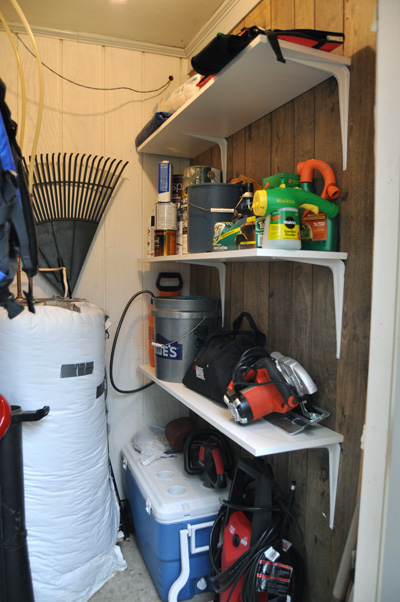
We decided to leave enough room under our bottom shelf for items that needed to go on the ground (cooler, pressure washer, etc.) and left around 20″ between each shelf to accommodate two paint cans stacked on top of one another. We also opted for 12″ deep shelves to give us enough room to actually walk into the shed (which has never possible before, I might add) and have some room to maneuver. We then excitedly put all of our items onto the shelves and off of the floor for the first time – ever. Oh, glorious organization.

I know these pictures aren’t the most exhilarating, but it’s amazing how much joy $34.00 and some elbow grease can bring to us. This whole project only took about 30 minutes and we’re so amazed that we hadn’t thought to do this before now.

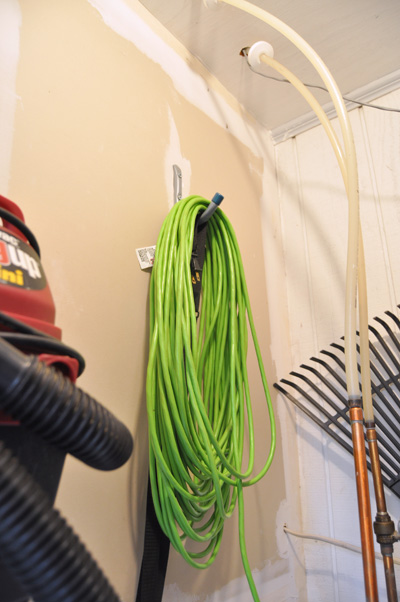
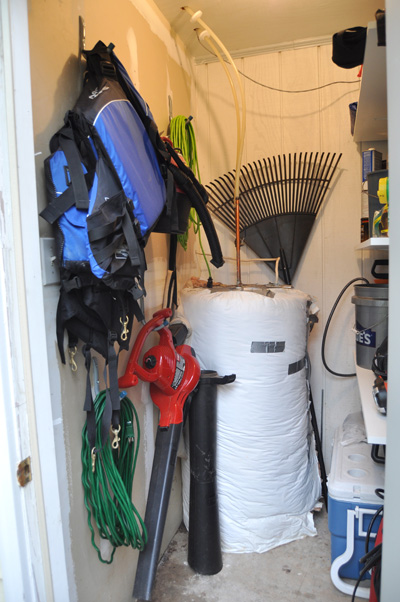
We left about 18″ between the end of the shelves and the door for our longer yard tools (shovel, rake) and kayaking paddles. The other side of our shed now houses all of our large hooks to hang items that can actually be accessed since we have room to walk into the shed. Praise God.

This might be my most favorite organization endeavor yet. Here’s to no more bruised shins and cursed words every time I have to go into our shed!

Don’t be Shady

It’s a funny thing, being an adult and living away from your parents. You grow up with these people who care for you every day and then once you’re old enough to survive on your own, you hardly see them. Going from 24 hours a day to just a weekend here or there really makes a difference in the relationships you have with people, especially your family. My parents came in town a coupe of weekends ago for my Mom’s 60th birthday and it reminded me how much I love my family. And I was reminded of their quirks. I somehow forgot the way my Dad clears his throat or sucks air through his teeth, since I don’t experience it everyday. Or the way that he used to add water to empty ketchup bottles to get the last bit out and we would all groan when we squirted a watery stream of ketchup onto our dinner plates. And I certainly forgot how I am EXACTLY LIKE MY MOTHER in almost every aspect. Thank goodness I think she’s swell or this could be quite the disappointing revelation.

Since this was such a momentous birthday, I had to make things a bit special. I corralled my other siblings and their adorable kids to take pictures of themselves with a birthday wish and then had a surprise waiting for my Mom when she woke up on her birthday. Simple, inexpensive and awesome.

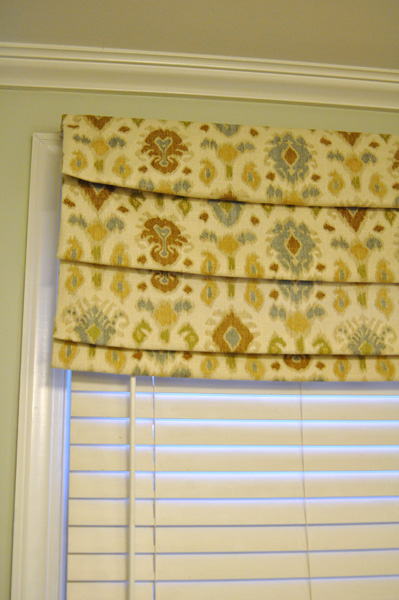
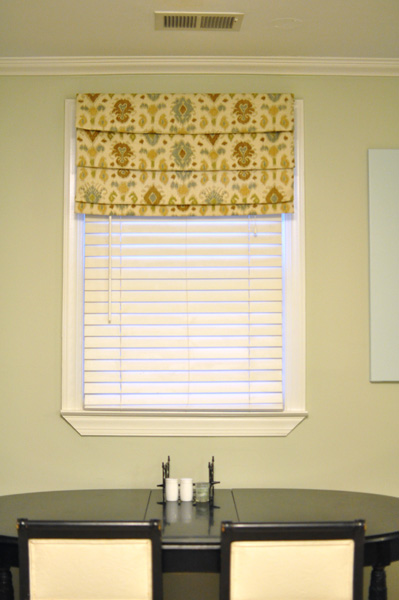
After whipping up some delicious Idaho Sunrise , we headed out to Mary Jo’s Cloth store (aka the best fabric store in all of existence) to find some fabric for my mom. Fabric + Mom = happiness.  I also wanted to pick up something for a little project I asked my Mom to help me with, as a belated birthday present. After our recent kitchen renovations, I wanted a little bit of pattern/fabric in the room, and was hoping my seamstress of a mother could help me figure out a faux roman shade. I pinned a couple of tutorials, and I’ll have to lead you to those instead of explaining the process myself. Frankly, I’m not sure how we got to the end product, but I’m glad we survived.

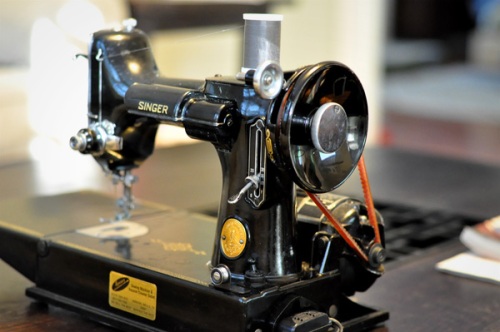
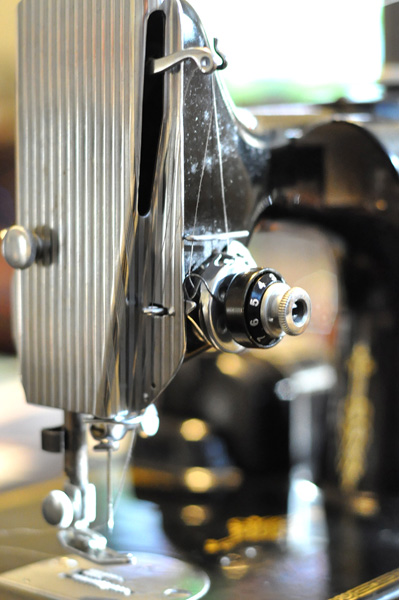
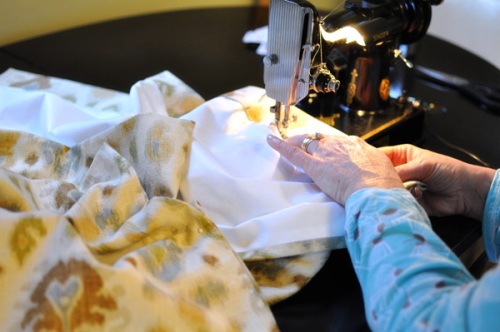
This is my sewing machine. And no, that’s not a joke. And yes, I know she’s ancient. But I have a special little place in my heart for her. My grandmother, who is an incredible quilter, bought my sister, mom and I this little Singer a loooong time ago in hope that we would all have a well made sewing machine to grow old with. I rarely sew, and know even less about it, but when I do – this Singer treats me well.

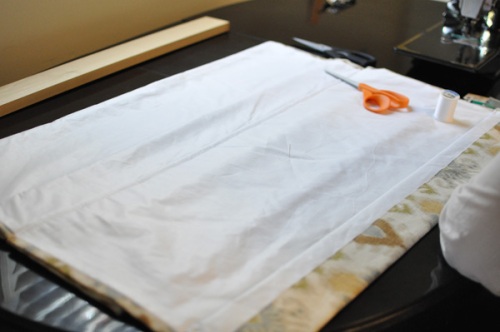
Our faux roman shade started with 1.5 yards of pretty fabric, and the same amount of liner fabric (a remnant for $1.75 – score!) and some white thread. My mom walked me through the basics of sewing a large rectangle (with the liner smaller than the shade fabric so you could have the pretty fabric wrap around the back) and how important it is to iron, iron, iron while sewing. The fabric shade was as long as the entire window, and just slightly wider (after seam allowances) than the wood blinds I have on the kitchen window. We flipped that puppy right side out, stitched the bottom hem and got to figuring out how the folds would work.

Why yes, we sew in our jammies. Aren’t we fancy? This picture is deceiving, though. My Mom was definitely the driving force behind this project, but I did do a good portion of the sewing. Of a rectangle. It’s an accomplishment, folks.

I wish a had a magic formula for how we figured out the folds, but that didn’t happen. I just knew I wanted the finished shade to be 18″ long (about 1/3 of the window) so we finagled our way to that dimension. We sewed the areas that would be hidden by other folds on the machine, and then whip stitched the back liner of the other folds to keep thing from being droopy.

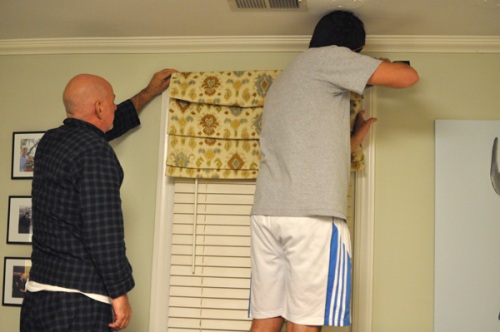
We then wrapped a 1×3 with our leftover fabric, draped the shade over the wood and stapled in place, and attached the whole thing to our window frame with some metal L brackets. And by we, I mean my dad and husband after an early morning golf game and a quick power nap.

Why yes, we hang window treatments in our jammies as well. The faux shade took a bit of trial and error but overall it was a really simple project. And I’m kind of giddy over the final product.

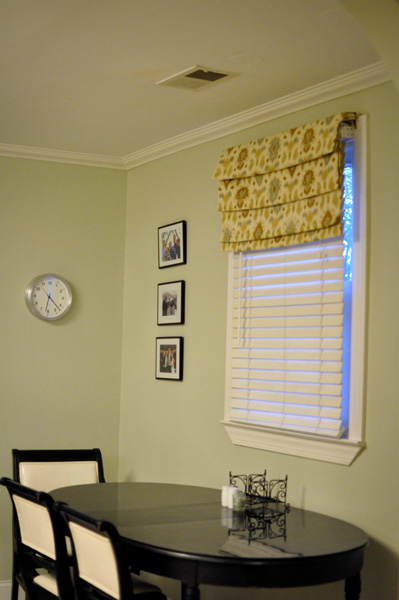
Hello, lover. Scott says is looks “western” but I say it looks fabulous. Again I’m on the ikat train after years of despising it. I think I’m growing up.

Thoughts on the new addition? Oh, and you can thank my husband, the Punisher, for the winning title of this post. Neat.

We bit the bullet and finally painted our kitchen cabinets after four years of living with yellow maple cabinets. Hallelujah! No, better yet, praise the good baby Jesus, no more nasty cabinets! We’ve been toying with the idea for some time now, and the time was juuuust right as a good friend of ours was starting his own finishing/custom millwork business and was looking for a job. Lesson #1: it pays to have friends.

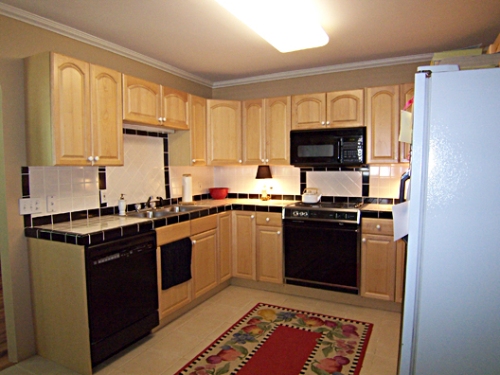
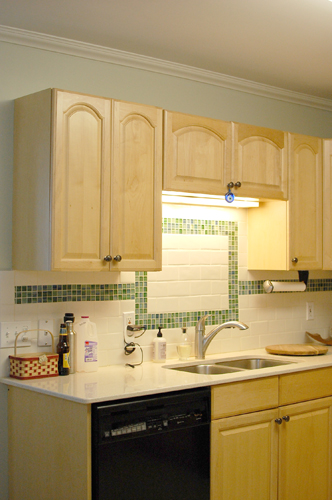
This is a picture of our kitchen before we bought the house. This is a picture that also induces nausea in me in about .25 seconds. Not too long after we moved in, we swapped out the horrendous hardware, put in quartz countertops and DIYed a tile backsplash.

The kitchen at that point was certainly livable, but not quite exactly what we wanted in the end. We always talked about painting the cabinets, but just didn’t think the finish would be nice enough for our taste. Lesson #2: it pays to pay someone else to do something well. Once we decided to go forward with hiring our friend Wes to refinish our cabinets, things moved quickly. We cut the costs down by doing the prep work on our own, and Scott helped Wes reinstall the cabinet doors at the end of the project. Lesson #3: it pays to think outside the box to save a few bucks. We also talked with Wes about options for paint and came up with the best solution that would 1) fit our budget and 2) give us the professional finish we were looking for.
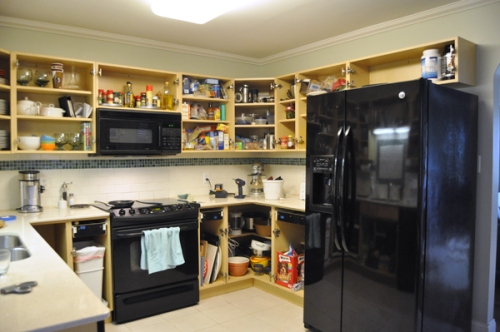
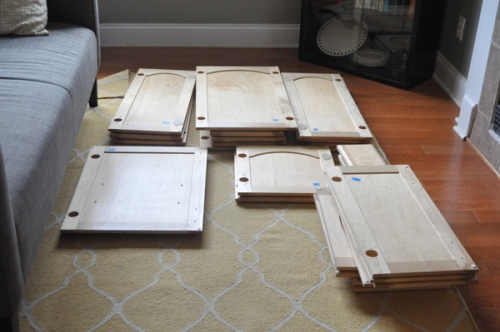
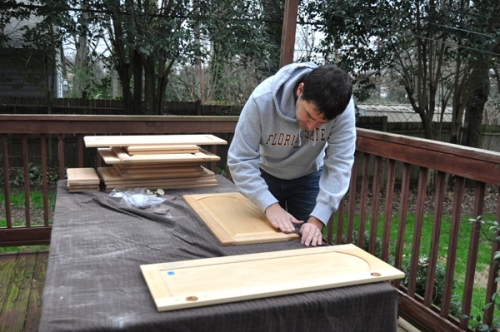
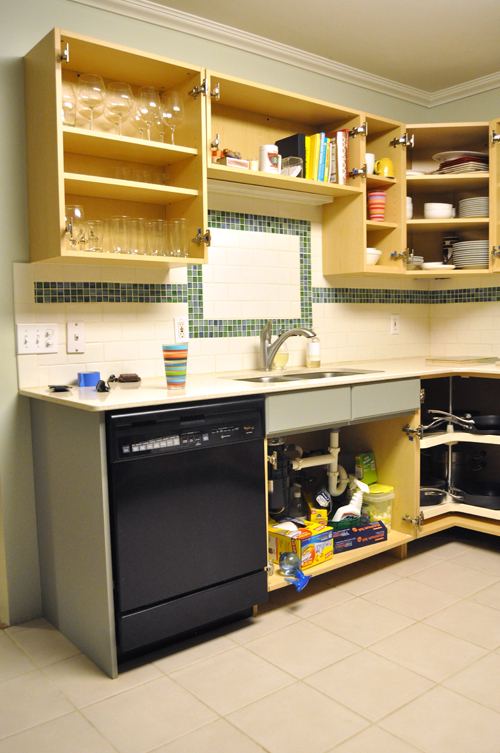
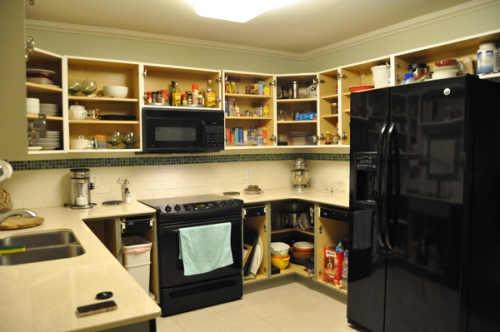
Our first step was to remove all hardware from the cabinets, and then remove all of the cabinet doors for sanding. This picture may or may not have led us to reorganize our cabinets. I don’t know how people live with open storage in a kitchen!

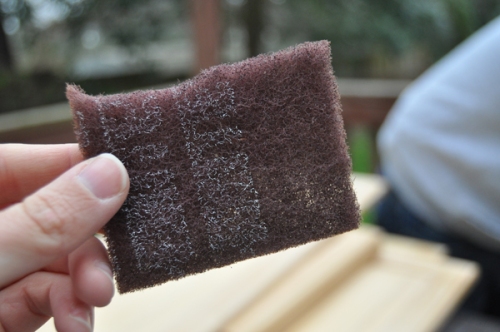
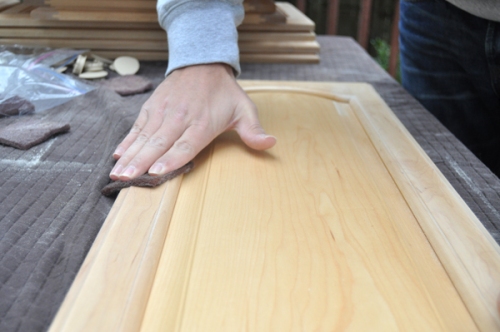
We numbered each cabinet and each door so after the painting was completed, we would be able to put the puzzle pieces back together. Our finisher instructed us to lightly sand each cabinet door, front and back, with a special sanding block (below). Since our cabinets aren’t real wood, we didn’t want to use a heavy sand paper and end up ruining our cabinets. A light sanding would be enough for the paint to adhere and would keep our cabinets looking lovely.

After sanding and wiping down the cabinets, our finisher took our doors off site to a spray booth and sprayed two coats of tinted primer (i.e. our paint colors) and one coat of water based polyurethane. Lesson #4: sprayed finishes trump rolled paint by a landslide. He also sprayed the sides and undersides of the cabinets that would be visible in the house (after taping off all of our cabinets, countertops and backsplash).

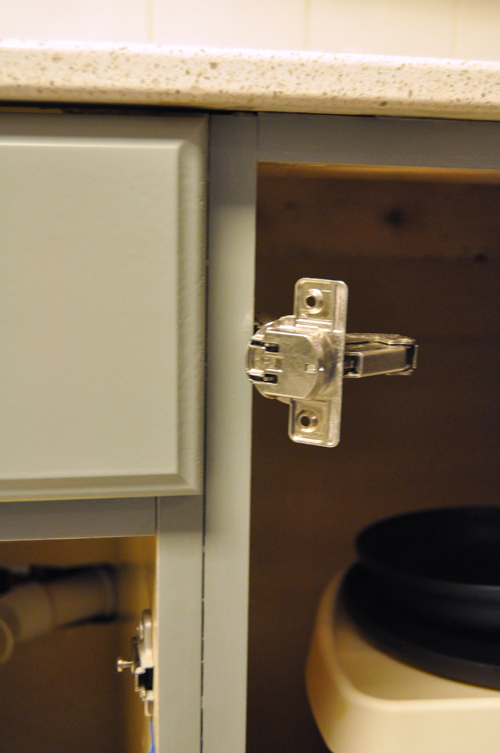
The industry standard for these pieces of your cabinets behind the doors (above) is called edge banding – basically, a heavy duty sticker that you put over these pieces of the cabinet. I was fine with the stock color for white, but the gray wasn’t tickling my fancy. What can I say? I’m an obnoxious designer. So we returned the edge banding for the base cabinets and sanded, hand painted, and added polyurethane to these stripes of exposed cabinet. Now I won’t see a slightly different color when I open and close my doors, which makes me infinitely happy. Lesson #5: be sure to think through the details so you’ll be happy with the end product.

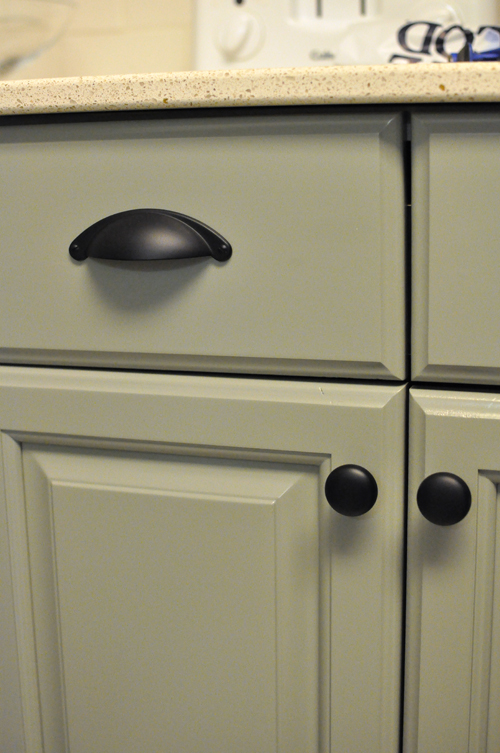
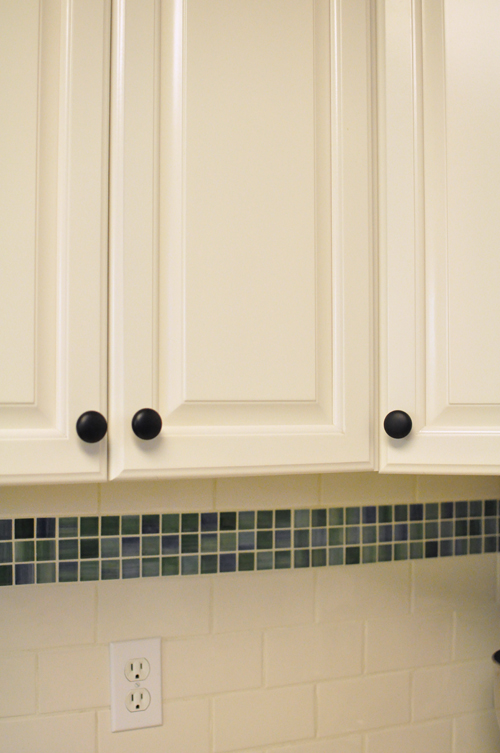
Once all of the sprayed/painted parts in the house were dried, we were ready to install the doors and new hardware, purchased from Lowe’s. I looked into hardware all over the place, but decided to go with something that we really loved from our big box store – and there isn’t anything wrong with that! I like to explore all my options and find the best bang for our buck, and this hardware was definitely the best solution.

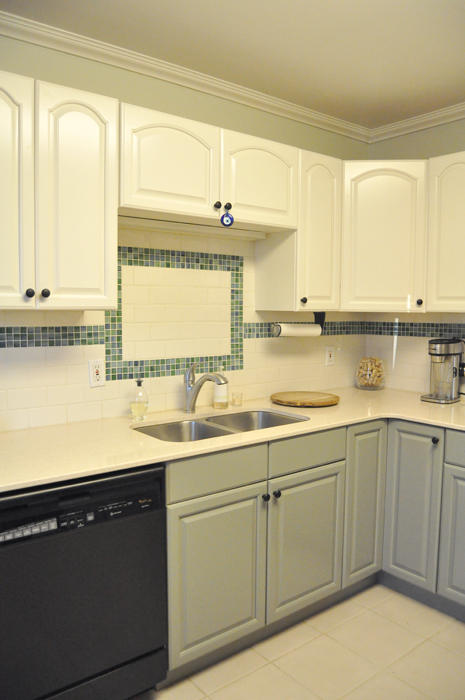
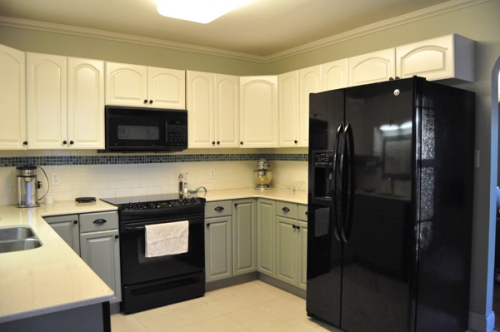
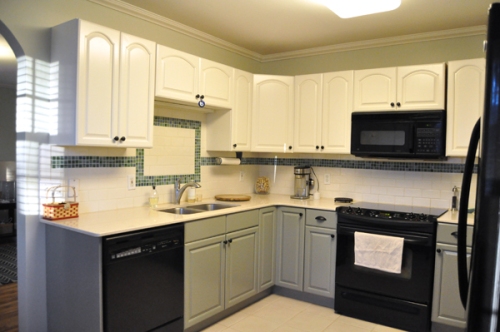
We obviously decided to go with the two-tone look, and we couldn’t be happier with our selections. We went with Benjamin Moore’s “Cloud White” on the upper cabinets and Benjamin Moore’s “Storm Cloud Gray” on the base cabinets. Now, for a bunch of pretty pictures:

I really wish these pictures would show you how beautiful the finish on these cabinets are. They’re like freakin’ butter. Our finisher said “just feel them” when he was finished, and I honestly haven’t stopped petting my cabinets since he left. Does the kitchen feel so much fresher/lighter/cleaner/more awesome? We’re pleased as punch, you might say. :) Next up: a rug, window treatments and possibly new lighting? Once we start we can’t stop!

Today has been absolutely GORG. Almost 70 degrees in January!? Usually at this time of year it’s cold, damp, dark and miserable – but today was a wonderful exception. We went for a walk at the park and it was literally shoulder to shoulder with people walking dogs, pushing strollers, riding bikes, and jumping on pogo sticks (no joke). People were out in droves after being cooped up indoors for entirely too long. You could say it was a good day.

The warmer weather gave me a little taste of Spring and pushed me into productive mode. You would think that being locked up indoors when it’s freezing out would give me lots of time to be productive, but instead I typically hibernate and whine about my cold feet. Warm weather = burst of energy. Today we painted the edge banding on our base cabinets to prepare for our finished cabinets doors to be installed on Monday. A much-anticipated blog post (for my parents and in-laws) will be coming your way next week. I went for a run, played tennis with my husband (running to the tennis court wasn’t my best idea), did laundry, deep cleaned the house from all the dust from kitchen renovation madness, and made some homemade cookies.

I’m exhausted even reading that.

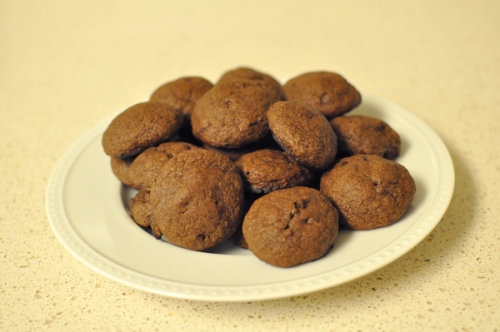
I’ve been trying my best to eat a bit healthier recently so when Scott suggested making brownies for dessert, I had to find an alternative. Sure, boxed brownies are incredible, but I’m enjoying finding new recipes on Pinterest that allow us some more healthy (and different) options for food. Have I mentioned how much I love Pinterest? Have you read a post about Pinterest on every blog out there? Yeah, I don’t care – I’ll be redundant. I love Pinterest and I don’t care who knows. :) I found this recipe and it turned out to be the perfect blend of healthier cookie and cake-y brownie. Yumm.

Lower Fat Double Chocolate Chip Cookies

Directions:

  1. Preheat oven to 350°F.
  2. Combine flour, baking soda and salt in a large bowl. (Do not pack flour when measuring).
  3. Beat butter and brown sugar with a mixer at medium speed until light and fluffy; gradually add granulated sugar, beating well. Add cocoa and egg whites, beating well. Gradually beat in flour mixture until blended. Stir in chocolate mini chips.
Drop by rounded teaspoonfuls (about 3/4-inch balls to get 40 cookies) onto baking sheets coated with cooking spray. Bake at 350°F for 10 minutes. Cool on pans 2 minutes or until firm. Remove cookies from pans; cool completely on wire racks.

You can find the original recipe here. Hope you have a warm weekend filled with productive time and cookies – the best kind of weekend there is!

Happy New Year, everyone! Care to see pictures of my Christmas decorations/gift wrapping nine days after Christmas? No? Yeah, that’s what I thought. I had pictures all ready to blog over the break and what did we do? Left the laptop at home. Fast forward to time at home and time with friends in town, and the Christmas blog post just never happened. Ah, such is life.

But what I will tell you is that we have FINALLY decided to paint our kitchen cabinets! To say I’m excited would be a vast understatement. This is what our kitchen currently looks like, in its perpetual state of un-doneness.

With stock, yellow-y maple cabinets a-plenty, our kitchen just isn’t doing it for me. We upgraded the countertops and backsplash a while back (with the intent of keeping the cabinets as is) but the more I live with them, the more they grate on me. Or, I should say, the more clear it is that they just don’t fit with our design aesthetic.

Luckily for us, we have a good friend who is in the wood working/finishing biz and has agreed to help us re-finish our cabinets, the professional way. We considered doing it all ourselves (i.e. rolling the cabinets) but decided to spend a little dough to have the cabinets done correctly (i.e. sprayed with a super fancy paint spray gun). Here are a few ideas I’ve been pinning for inspiration (all images from Pinterest):

Obviously I’m thinking two-tone cabinets, but I’m (of course) second guessing myself. I’d like to find a picture with black appliances to put my mind at ease, but I think I may just have to take a giant leap here and hope for the best. Any thoughts? We’re hoping to paint the cabinets sometime this month, so stay tuned!

A while back, I spent a chilly afternoon indoors with a sweet family and their newborn baby, Caroline. When I first saw Caroline, I immediately thought “Gerber baby!” and she didn’t disappoint as the day went on. I’ve been fortunate to have great newborn sessions with happy babies, and Caroline was one of the happiest. Enjoy!

’tis the Season

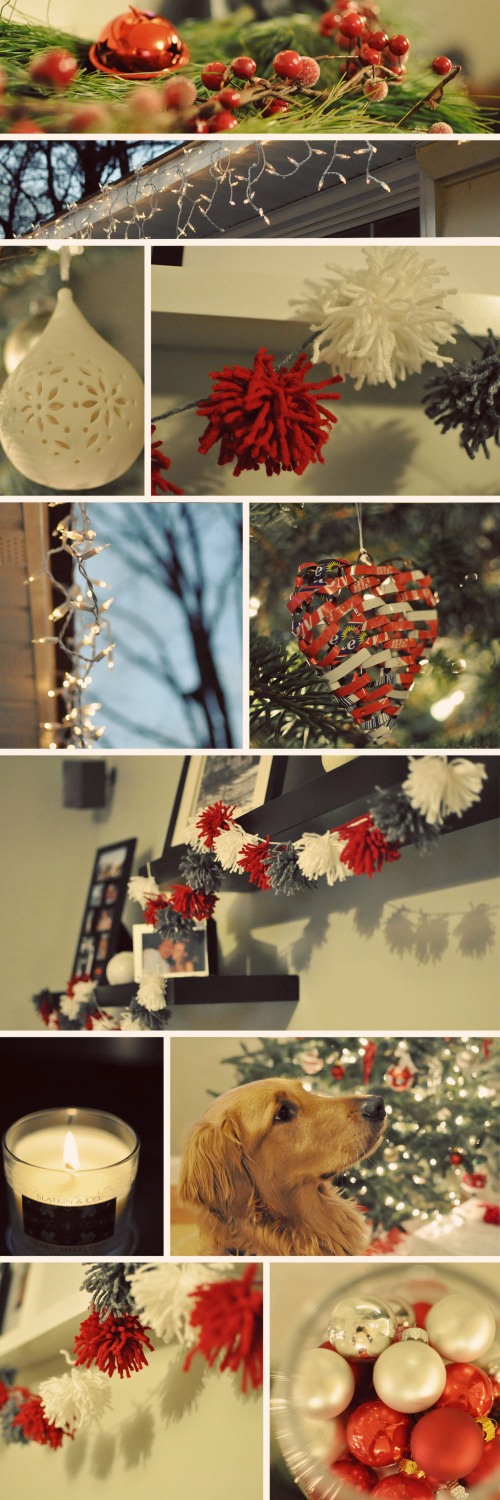
It’s beginning to look a lot like Christmas around here! Or, insert your favorite holiday cliché to accompany this collage.

Is it weird that I feel more festive this season because of my new bangs? Is it strange that somehow I feel more merriment oozing from my being because I cut certain strands of my hair slightly shorter so they hang against my forehead?


I think I answered my own question.


Bangs or no bangs, it’s finally frigid here and we’re finished with our holiday decorations. The mistletoe candle is a’burnin and we’ve busted out the hot chocolate more than once. I love the holidays! Hope your home is warm, cozy and filled with holiday pom pom garland (tutorial to come)!

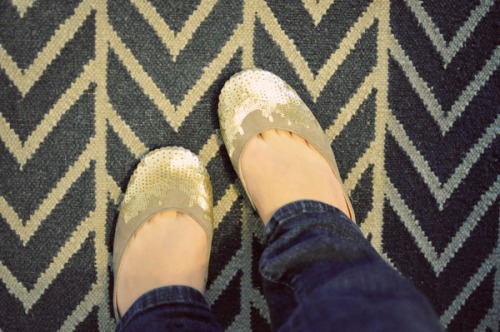
Ahh, new shoe day. It could possibly be one of the best kind of days.

It’s right up there with haircut day, or new backpack day when you’re in grade school. It’s all about life’s little pleasures, right? I’m feeling particularly thankful this November – not only because of the obvious reasons (good health, job, etc).  but for the little ones as well. Super sales on sweaters that look like Marc Jacobs but aren’t. Upgrades to first class for my husband’s work flight. A dog that is infinitely happy. A drama free Monday at work. A quilt that our dry cleaner ruined becoming available again at Target so I can buy it for a second time. Our warm and cozy little home. Having one side of the family’s Christmas shopping done – before Thanksgiving.

Hope everyone is having a lovely Monday filled with life’s little happy moments!

This may have been my most fun session to date. Let me paint you a little picture: I went back and forth with this family trying to pick the perfect location, and they finally decided on a golf course at a club they’re members at. We hopped on some golf carts and rode around an empty course, filled with beautiful fall leaves and bright sunlight, and took some fun family pictures. You can’t get any better than that can you?


This family is sweet, energetic – and good golly, photogenic! I had a great time exploring a beautiful golf course with them and getting to know them!

One of my favorite things is when children are little mini versions of their parents – and this family is certainly no exception. It makes me excited to see what my (future, not any time soon, don’t get excited, Mom) children will look like!

Hope you enjoyed this session – and hope you’re getting the amazing Fall weather that we are right now!