Feeds:
Posts
Comments

Posts Tagged ‘Exterior’

So We Painted a House

*update: I failed to document the paint colors we used when painting this house, so I’m sorry for not including that information below. This was so many years ago that I’m not able to track them down at this point. My apologies!

Hello, blog friends. I won’t even waste my time apologizing for my absence because really, I have no excuse. I just decided to not blog for a while. But now that we completed a HUGE, much awaited project, I can’t wait to share!

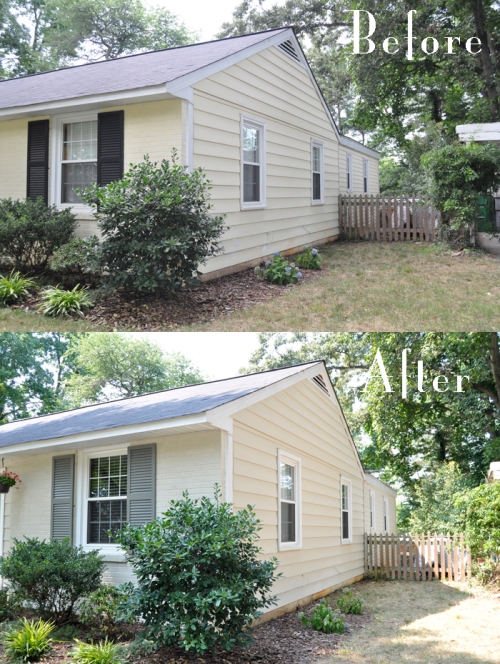
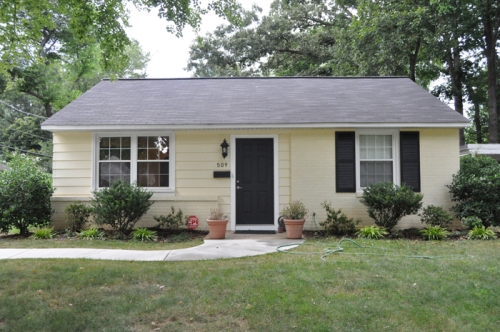
Here is our house. When we purchased it five years ago, the listing called it a “cream puff of a house” and that slogan always stuck in my mind. The color was definitely cream-puff in nature and just plain boring. The paint was in good shape when we bought the house though, so I kept my mouth shut (for the most part) and dealt with a less than lovely house color.

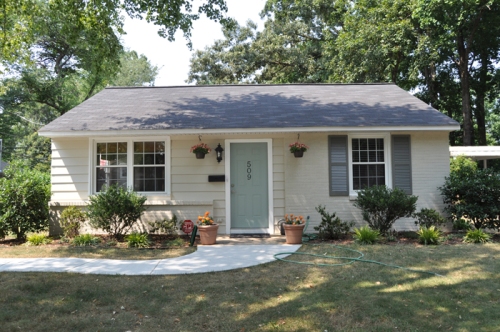
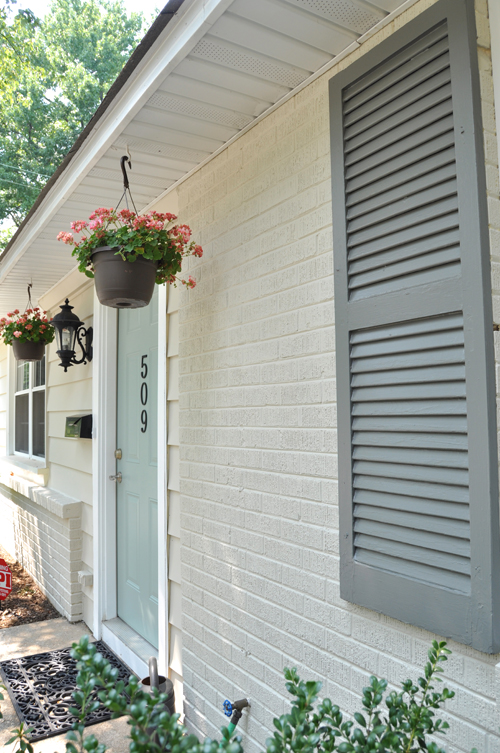
Fast forward 5 years and Scott and I were going for a walk around the neighborhood with Chachie (what my nephew so affectionately calls Charlie) when my husband said that we needed a new house project this summer. I refrained from mentioning the house color yet again, even though the paint was starting to show some wear in some areas. Well, lo and behold, without any pressing from this girl, my husband suggested that we paint the house. Two high kicks and a month later, we had our colors selected (from a starting pile of 100 options and several Pinterest ideas) and started on the project of the year. This is what we came up with:

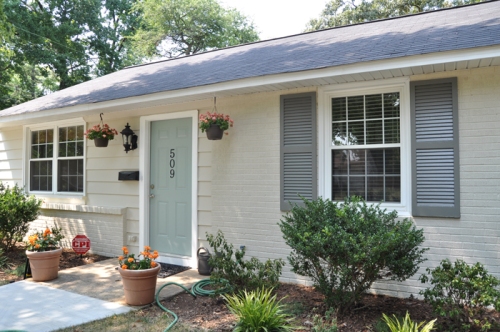
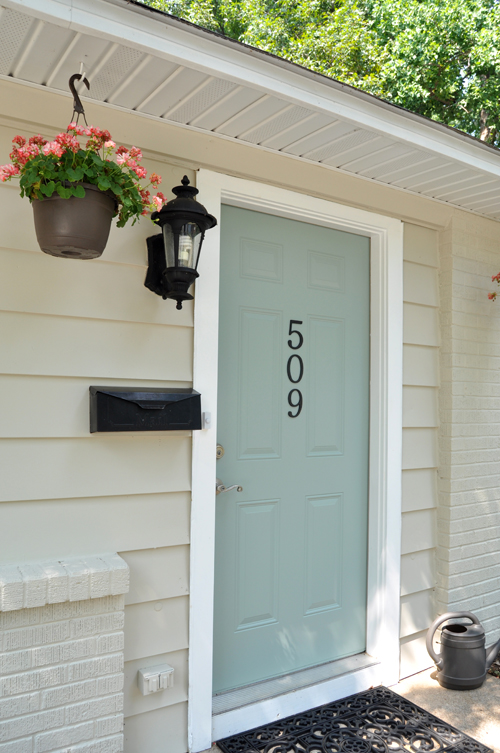
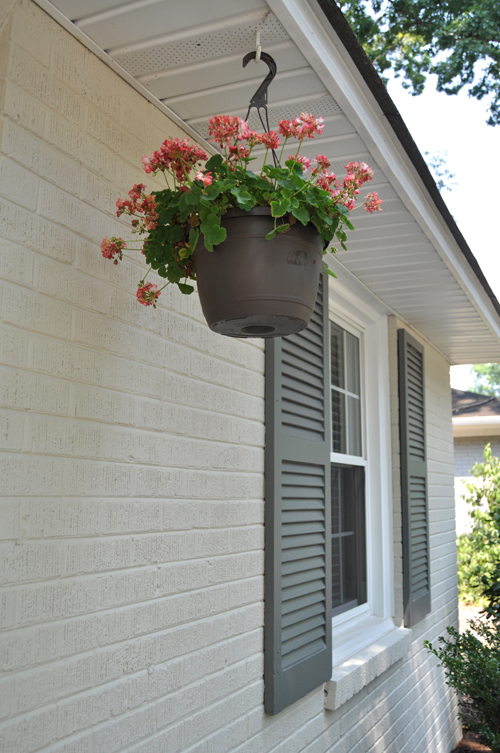
Freaking adorable, isn’t it? I’m smitten. We didn’t want a drastic change, but we did want to get away from the creamy yellow and black combination. We first considered gray, but neighbors on both sides were gray, so that was out. Then white came to mind, but we were afraid the house would look too washed out with the white trim. We then decided on a cool beige with lovely blue and gray accents, and it was the perfect decision for us. Nothing outlandish, a little bit classic and a little bit cottage. Perfecto.

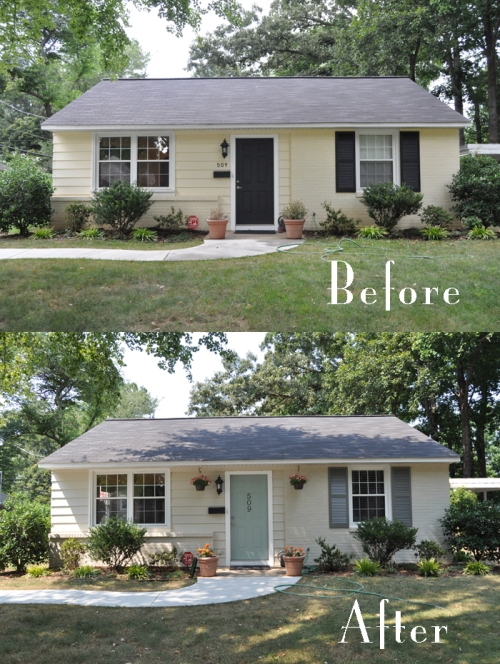
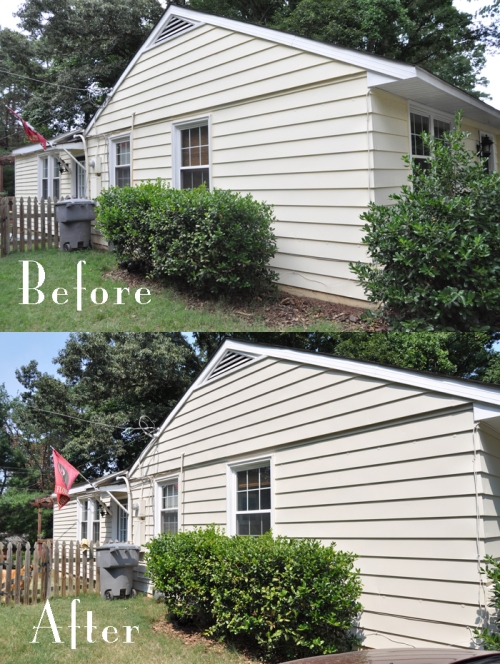
The best part (or the worst, however you look at it) is that we painted the whole thing ourselves. That’s right – we painted every square inch of our home in the beginning of an extremely hot summer. It may not have been our brightest idea, but we’ve lived to tell the tale. We contemplated renting a sprayer to make the painting part easier, but decided that the cost/time of prepping to spray just wasn’t worth it to us. My sore muscles say otherwise, but I think we definitely made the right choice. We spent about 18 hours total trimming everything, rolling, and painted the shutters and all doors new colors. We aren’t quite finished, if you look at the pictures closely. We still need to roll the two longer sides one more time and paint the foundation, but for the most part we’re there. Now, for some before and after comparisons:

Isn’t it so f***ing charming you could just die? The side by side of just the house color isn’t that drastic in pictures but believe me, it’s a big change in person. Our neighbors can’t stop commenting on how much better it looks and we can’t stop beaming (proud, much?).

Please excuse our wilted plants – it’s 104 degrees outside. Literally. Oh, you’d like to see some more picture so the beautiful door color? I thought you’d never ask.

Hope everyone has a wonderful Independence Day holiday and stays cool!
Read Full Post »

Shed Shape-Up

This is one of those projects that just “happened”. Scott and I have a habit of working on something and then it suddenly leads into 3 other projects that really need to be done – thus taking up an entire day, when we set out to only spend 20 minutes in the yard. Since the weather has been so nice, we’ve been trying to focus on getting our yard into better shape. Thanks to sunshine and MiracleGro, we’re actually seeing some growth in some plants that have been so-so for the past 5 years.

Ahh, Spring. We had a landing at the bottom of our deck’s stairs that needed some addressing, so we purchased some 2x8s to re-build it and fill in with some new, larger gravel. This entailed getting the circular saw out of shed, which then led to this:

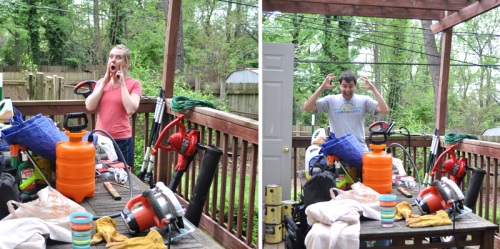
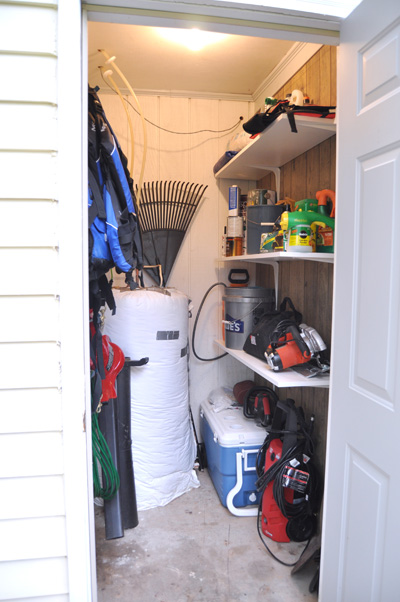
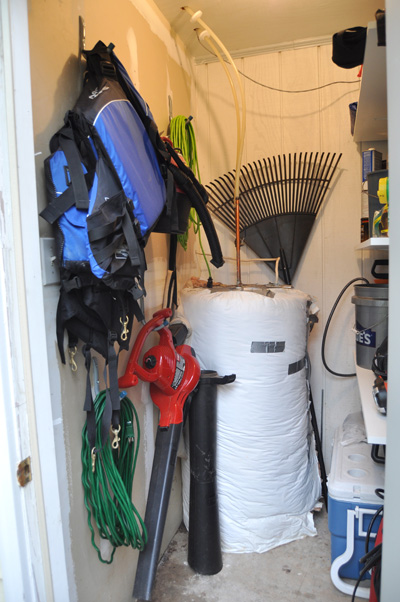
These are the contents of our tiny shed and the shocked/frustrated faces at how much crap was crammed into an unorganized space. This shed has always been a bone of contention in our household – no matter how well we organized it, stuff just ended up on the ground and it required taking everything out of the shed just to find one item. In terms of organization, this situation was not good. After completing our stoop project, we knew that we had to address this pile-o-crap once and for all, rather than just throwing everything on the floor again.

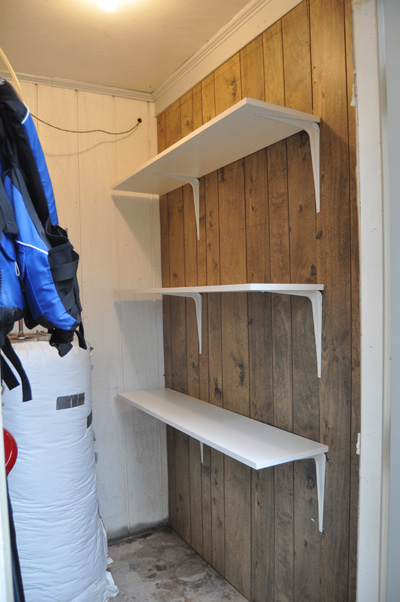
So, off to Home Depot we went, for the second time in one day. We talked to a very helpful salesperson who led us to some powder coated brackets and (3) 12×48 melamine shelves  – no cutting required.

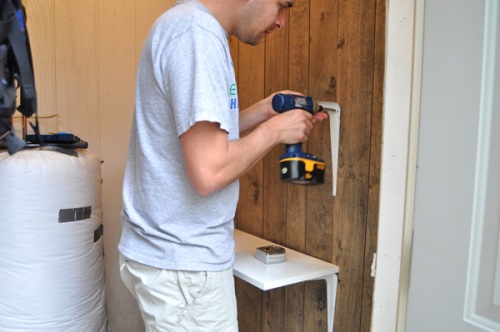
We cleaned her out, gave her a good sweeping and got to work with drilling our brackets into some studs.

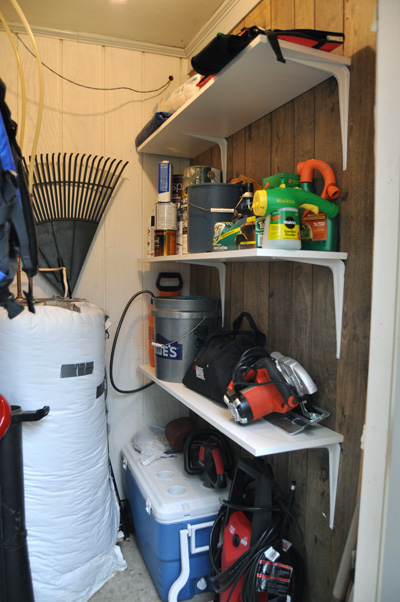
We decided to leave enough room under our bottom shelf for items that needed to go on the ground (cooler, pressure washer, etc.) and left around 20″ between each shelf to accommodate two paint cans stacked on top of one another. We also opted for 12″ deep shelves to give us enough room to actually walk into the shed (which has never possible before, I might add) and have some room to maneuver. We then excitedly put all of our items onto the shelves and off of the floor for the first time – ever. Oh, glorious organization.

I know these pictures aren’t the most exhilarating, but it’s amazing how much joy $34.00 and some elbow grease can bring to us. This whole project only took about 30 minutes and we’re so amazed that we hadn’t thought to do this before now.

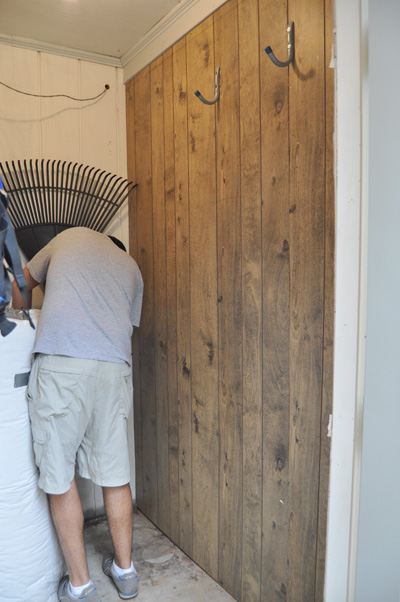
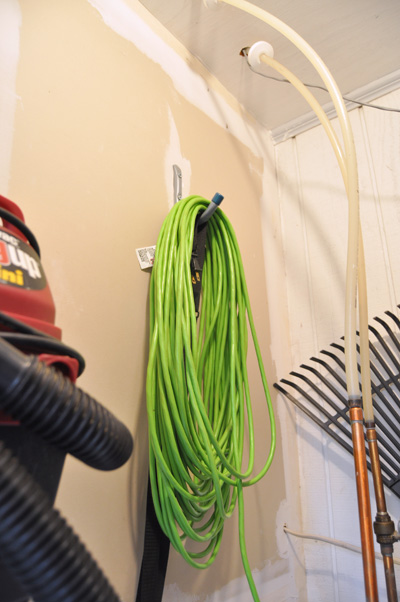
We left about 18″ between the end of the shelves and the door for our longer yard tools (shovel, rake) and kayaking paddles. The other side of our shed now houses all of our large hooks to hang items that can actually be accessed since we have room to walk into the shed. Praise God.

This might be my most favorite organization endeavor yet. Here’s to no more bruised shins and cursed words every time I have to go into our shed!

Read Full Post »

’tis the Season

It’s beginning to look a lot like Christmas around here! Or, insert your favorite holiday cliché to accompany this collage.

Is it weird that I feel more festive this season because of my new bangs? Is it strange that somehow I feel more merriment oozing from my being because I cut certain strands of my hair slightly shorter so they hang against my forehead?


I think I answered my own question.


Bangs or no bangs, it’s finally frigid here and we’re finished with our holiday decorations. The mistletoe candle is a’burnin and we’ve busted out the hot chocolate more than once. I love the holidays! Hope your home is warm, cozy and filled with holiday pom pom garland (tutorial to come)!

Read Full Post »

Back in Black

Operation “fix up this house” is still underway, despite the fact that we decided to stay put. We had our house appraised recently to see if our hunch was correct, and unfortunately it was. The appraisal had “terrible market” and “wrong time to sell” written all over it. Ah, such is life. We figured we weren’t immune to the economic downturn, but you can’t hurt a girl for trying, right?

Despite the semi-bad news, we still wanted to do a few easy projects around the house that had been on the list for a good long while. One of these was painting our front door. A super simple project, but something that we couldn’t do during the blistering cold months of winter. Why did we need to paint the front door so badly?

Oh, that’s why. Bleagh. And what’s that odd shaped swoosh of nasty whiteness on the bottom right?

That’s from a slug. A SLUG. One of the very unfortunate side effects of summer in this here neck of the woods are slugs. They hang out on our front stoop and sometimes make their way up onto our door frame (even typing this is making me nauseous) and one time, onto our door. If you’ve ever tried to clean a slug skid mark before, rest assured that I can sympathize with you. They literally DO NOT COME OFF. Not only are slugs disgusting, the “presence” they leave behind is even worse. Moving on.

We picked up a quart of exterior black paint and a mini roller, and got to work on one sunny afternoon. We made a little “doggie barricade” with some dining room chairs to keep the pooch from messing up the paint job, but we barely had to keep Charlie away since the project was so quick. The one coat of paint we applied dried in about 15 minutes, and we used a hair dryer to dry the edges so we could (almost) close the door to keep any dust/bugs out of the house.

What do you know? 15 minutes of our time gave us a door that looked like a million bucks. Well, maybe closer to 100 bucks, but a door without a slug mark is a gold mine in my book. Just check out the close up now.

Ah, slug free. We got such a kick out of our mini project that we decided to paint all of the doors in our house – that’s three total doors with one quart of $5.00 paint. As my husband would say “well, butter my butt and call me a biscuit”.

Yes, ladies, he does use that phrase on a regular basis. And yes, he’s taken. :)

Read Full Post »

Lipstick on a Pig

Also know as “the most boring post ever written”. I’m not really sure why I’m posting this, other than the fact that I hope someone can benefit from this super easy idea to add a little lipstick to a pig (does that saying crack up anyone else?).

I have a little secret to share. We might be selling our house. Keyword being might. We got a wild hair a few weeks back and decided to do some research to see if selling our house was possible and, most of all, beneficial. Since then, we’ve been immersed in meeting with realtors, talking with mortgage brokers and crunching the numbers to see if this venture is something we’d like to dive into or not. The verdict is still out, but I’ll keep you up to date on our (super-huge, very adult-like) decision.

All of that info leads to this post: how we spray painted our outdoor sconces. Luckily for us, our house is almost in show-ready condition, but there are a few things that we wanted/needed to tweak before we could put the ol’abode on the market. Even though we haven’t made the big decision, we decided to get a head start on a few little weekend projects to spruce up our place for any potential buyers.

These were our sconces before. The word you’re looking for is bleagh. Our sconces were old, dirty and just plain sad-looking – the last think you want a potential buyer to see when they first approach your house.

Check out the layer of bug film on the glass and the cobwebs that have imprinted themselves onto the once black finish of our sconces. We decided to save ourselves a few bucks and just spray paint these fixtures with some outdoor spray paint (flat finish) rather than replacing them with something new.

We started by taking off the top of our sconces, and then used a razor blade to score the area where the base of the sconce was attached to the house. After the sconce was able to be removed, we disconnected the power (always remember to turn off the power at your circuit breaker first) and pulled out the glass panels that were screwed into place. We used a steel wool pad to clean both the sconce and the glass, and used a little elbow grease to get everything as clean as we could. Two coats of spray paint later, and we ended up with this:

Looks brand new, no? We were shocked at how much of a difference a new coat of paint (and clean glass) made the front of our house pop. We added some clear caulk around the fixture once it was back in place, which was just the icing on the cake.

We took our standard sconces from drab to fab in a little under an hour for only five dollars – why hadn’t we done this before? We have a few other little projects on our list that we’ll tackle whether we decide to put our house on the market or not. Any little afternoon projects like this that you’d like to share?

Read Full Post »

Happy Halloween!

Happy Halloween, blogland! Guess how many trick or treaters we had tonight? Zero. Guess how much candy we had for the non-existent trick or treaters? A lot (see exhibit A above). And to put the icing on our lame-filled cake, our heavily decorated neighbors had about 12 kiddos drop by, while we were sadly kid-less. Looks like someone in this house will be having a stomach ache tonight!

Speaking of stomach ache, have you ever tried Pioneer Women’s country fried steak? We decided to cook this up tonight and in the words of my husband, “ohhhh mama”. It literally feels like a ton of bricks in your stomach after about 20 minutes, but it’s totally worth it. I promise we don’t eat like this all of the time, either – some days you just have to have an incredibly unhealthy meal.

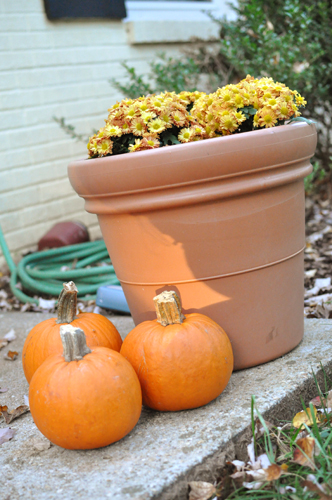
A funny little story about our Halloween decorations this year. I’m not the biggest Halloween fan. I’m not against the holiday or anything – I just don’t tend to decorate the abode until Christmas time comes around. We decided to take Charlie up to the park this morning to get a bit of wearing him out running in, and what do you know? Someone had dropped about 30 little pumpkins near a storm drain. What would possess a person to leave a heap of perfectly adequate pumpkins at a neighborhood park?I tried to figure this out while I looked at the loot, and decided that this person was giving me a golden opportunity – free decor! I could have brought home enough pumpkins to lure 100 trick or treaters to our house, but I decided to just bring 3 home to jazz up our front stoop a little bit. They look quite nice next to our new little mums as well.

I’m hoping these flowers will stand the test of time like our geraniums did last year. Evidently mums are very low maintenance and do well in cooler temperatures, so it sounds like the perfect companion to my very black thumb.

On another note, with the cooler weather trickling in, the leaves are really starting to cover our front yard. Every year we loathe the days when we have to rake/mulch/bag the immense amount of dead leaves and we’re always trying to find a way to streamline the process. This year we’re attempting to blow the leaves a few times to a staging area on our driveway, and then spending one long afternoon bagging everything once the trees are dry.

My idea to “streamline the process” was to hire someone to pick up our leaves. For some reason Scott didn’t seem to jump on that bandwagon. Does anyone out there have a less painful approach to gathering leaves that we should know about? We’re not quite used to this arduous process yet, since we both have Floridian roots (where Christmas day consists of shorts and 80 degree weather). Anyhow, hope everyone has a great Halloween and is enjoying the beginnings of Fall!

P.S. Halfway through writing this post, we did indeed get some trick or treaters. Scott was so excited and told them to take as much as they want (rookie mistake) and they proceeded to clean out our entire candy bowl in 5 seconds like a pack of rabid dogs. Oh, and one of them was dressed as Prince, the Purple Rain era. Hilarious!

*A reader asked for the recipe for the country fried steak. I used Pioneer Woman’s cookbook, but it seems like the recipe is here on her site as well. To make the gravy, just add some flour and milk to the leftover grease in your skillet. Disgusting but delicious!

Read Full Post »

Happy first of June, everyone! Yeah, June… that’s what I said. Can you believe that Memorial Day has come and gone and we’re now in friggin JUNE? I’m having a bit of hard time getting back into the swing of things after such a great holiday weekend, so I figured I’d talk about fun things to come to put me in a better mood.

We haven’t done too many home improvement projects around the abode recently. We got to the point where things were “acceptable” which led to laziness. Or exhaustion. Maybe a little bit of both. But now that summer is on the horizon, I have the itch to spruce things up a bit to avoid complacency. We’ve already painted our kitchen and den and purchased a new bedspread for the bedroom and rug for the living room. But is that enough? How dare you even ask.

Here is our kitchen as it stands today (minus the new wall paint color, which has yet to be revealed). We spent a few smackaroos to update the countertops and backsplash a while back, but now I’m dying to update the cabinets a bit. Our cabinets are in great shape (albeit not my favorite style), but we decided to keep them rather than spend a ton of money on brand new cabinets. I’m fine with the stain color, but it just doesn’t wow me. How about a little facelift, shall we?

Here is my first idea in a (very rough) photoshop image. I really really want white cabinets, but I just can’t bring myself to have white cabinets, white countertop, white backsplash and a white floor – boring, right? I like the look of two-toned cabinets and I think a dark, gray-blue would be just the ticket for our little kitchen. But, of course, the hubs doesn’t quite agree.

Scott thinks that white-on-white is where it’s at and not at all stark/institutional/boring. I’m not sure I can stomach that much lack of color, so I compromised with a light gray on the bottom cabinets to bring a little bit of contrast into the space. Leave me a comment with your thoughts on this (very possible) future change!

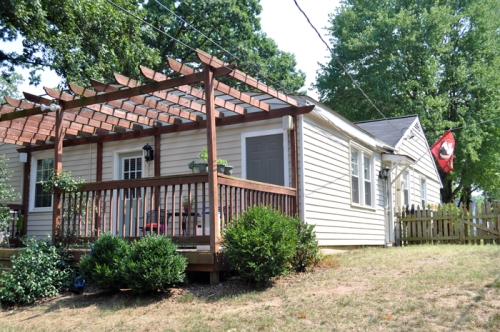
We’re also very seriously considering fixing up our deck, if the weather can hold off for an entire weekend. The current stain is looking pretty rough and we don’t want to go to the expense (and maintenance) of re-staining. Plus, we think we’d like the look of a painted deck better since we’d like to have the floor and railings/trim be two different colors. After a long afternoon in Lowe’s staring at exterior paint options, I think we’ve come to a solution.

We’d love to make all of our railings and the arbor a clean, crisp white to tie into the trim on the rest of the house -and to give our deck a lighter feel. A white floor is just out of the question, so we selected a dark, gray-blue (see a pattern here?) for the deck floor, as well as the stair treads. This palette will then open us up to painting our deck furniture, which is in severe need of a fresh coat of paint (can we say lime green chairs?!). Are you chomping at the bit to see the deck makeover? And what about the kitchen – paint away or stay the same? Sound off!

Read Full Post »

Yowza. The Charlotte area was hit with quite the hail storm last night – Florida style. Growing up in Florida, I became completely immune to bad storms. It was an every day occurance to have intense lightning storms and downed branches all over the yard. Now that I live a bit more north, I’ve lost my edge and actually get a bit nervous when a big storm comes our way. Especially since I’m a homeowner.

This storm brought some nasty hail that actually did a little bit of damage to our roof. Nothing too major, but it was enough for us to investigate the condition of our roof and think about possibly taking the plunge and getting our roof replaced. We looked into our insurance policy and think that we could get a good portion of the work covered, so once Scott mentioned “new roof” I started thinking “new color schemes”.

You see, I’ve been dying to repaint our house since we purchased. It’s a perfectly fine shade of yellow, but it’s just not quite… us. I’m not sure if we’ll want to invest in a full exterior overhaul before we sell our house (whenever that day might come) but it’s fun to dream, right?

I love love LOVE the look of a grey house. Call me crazy, but I’m giddy over grey recently. Add in a pop of color on the front door and I’m as happy as a clam.

This dark house color and chartreuse door is dead on for me. I can even imagine a lighter colored roof here, even though I’m partial to a dark, almost black roof.

I could even get on board with a sweet colored door, like this beautiful sky blue. It’s just enough to offset the neutral exterior but still gives enough pop to set this house apart from the others on your street.

This look is super traditional, but I kind of love the taupe colored roof with the white on white exterior color scheme. Add in a simple black door and this color palette is crisp, simple and will stand the test of time.

So many options, yet so little money. On a completely different note, I’ve been wracking my brain for a while now trying to figure out what to put over the mantle in our living room. I’ve been debating over a stretched canvas with a photo that we’ve taken, a fun textile or a funky mirror. Enter option 3:

Funky, beachy driftwood mirror, courtesy of West Elm. I’m not sold on this, but it’s a fun option, no? Thoughts on my random Monday ramblings?

Images borrowed from Google and West Elm, and lovingly displayed

Read Full Post »

Loathing Leaves

Isn’t this a lovely sight? Every Fall, I get excited about the changing leaves and being able to enjoy the vibrant yellows and reds for a brief amount of time. Our neighborhood is transformed seemingly overnight into a movie-like set up. The slight nip in the air and the energizing colors that are introduced into the landscape almost make me forget about the awful event that happens shortly after the initial high – the dreaded raking of the leaves.

Ugh.

And that’s not even the half of it. Or a fourth of it. Thanks to our super lush neighborhood, every fall we have an all out battle against dead and decaying leaves. It’s a fight against time to rake them up to save our grass, only to be defeated by the evil leaves the very next day. It’s obnoxious. This year, however, we decided to take off our DIY hats for a second and give some local landscapers some extra cash by doing them the honor of raking our leaves for us – all for the cool price of $60. Scott actually said “that’s the best $60 I’ve ever spent” after we admired the 24+ bags lined along our street, all while relishing in our un-sore muscles. We’ll do our fair share of raking to keep things from getting out of hand, but we plan to hire professional help at least one more time to give us some time for other, more enjoyable things this Fall. What are your thoughts on hiring someone to rake your leaves? Some of our friends seemed to think $60 was a bit outrageous, while others agreed that it was money well spent. Sound off!

Read Full Post »

Gate Rehab

Apparently when Scott and I are apart, we’re super productive. If I didn’t like him so much, I’d suggest we spend more time apart so we could get all of our little house projects completed! While I was having a girl’s weekend in Las Vegas, Scott and our frequent house-helper Todd worked their magic on our dilapidated deck gates.

The gates were literally falling off their hinges and breaking apart at the seams, as you can see in this old picture. They were in desperate need of some TLC, so luckily for me, the hubs obliged.

The boys reused the vertical slats and hardware from the old gates, but bought some new lumber to construct the rest of the gates. A power saw, some nails and two motivated dudes was all it took to take our shabby gates to new and sturdy in a matter of hours.

Now, as you can tell, the gates aren’t quite finished yet. We pressure washed our deck a while back (and by we, I mean Scott) and were planning to refinish it once we figured out what to do with it. We’re considering staining it to match the areas that weren’t pressure washed (ie. the arbor) but this might be the perfect opportunity to do something different. Should we darken the wood up a bit to have a modern, dark wood look? Maybe a whitewash or some crisp white paint? Any thoughts on our big deck decision are more than welcome!

Read Full Post »

Older Posts »